

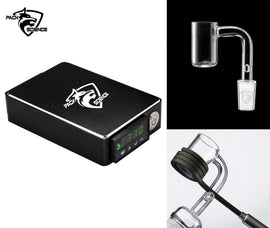
How To Find Your Heat Coil’s XLR Plug Pin Wiring Compatibility


Switching to a new coil:
Making sure that the pin wiring order on your heat coil plug matches your enail controller is of the utmost importance when buying a new coil for your existing controller. If not, your enail definitely won’t work, and you might end up with a hot mess. Normally a mismatch just results in the coil not delivering any heat, but in rare cases the coil can start smoking and completely fry itself! I’ll help you avoid this sticky situation.
The coil’s XLR plug probably looks like it fits, but unfortunately that doesn’t mean that it’s actually compatible with your enail controller. At one point, some enail controller makers got the bright idea to swap the order of the 5 pins on their XLR plugs as a sales tactic to try to get repeat customers.
This shady tactic makes for a frustrating experience for the rest of us. Since the wires are switched around in different coils, it makes it more difficult to buy a replacement from a different brand. These sellers are betting you’ll just take the lazy route and come back to them purchase your heating coil upgrade and/or replacement.
Thankfully a little bit of awareness goes a long way. This issue is fairly easy to solve once you are equipped with just a bit of basic knowledge about your heating coil. I’ll show you some easy ways to find a new coil that will be compatible with your existing controller. With some additional skills, may also be able to convert incompatible gear you may have already purchased. If you have a suspicion that your malfunction might be due to a mismatch we may be able to fix that for you ASAP!
How do I know if I have a mismatch?
The different combinations of possible mismatches on the wiring orders can cause varying errors. The most common issue you will see is the error message “EEEE” on the controller’s display screen. This is the exact same error you see when the enail is on but the coil is unplugged, or the thermocouple burnt out in the coil. That’s because EEEE basically just means that the controller is not getting any temperature reading from the coil.
If you coil is still good and plugged in all the way, you can be certain that you have a mismatch if the enail controller screen reads EEEE.
The heater just needs to be swapped out for a new heating coil that has the same wiring order to match your controller box. For example the standard wiring for controllers and coils on this site is: PIN1=AC load, PIN2=AC load, PIN3=TC+, PIN4=TC-, PIN5=GND. The image below shows what I mean by the pin numbers. The pins should be labeled with numbers next to them.
The easy way to find your heat coil pin wiring order:
The first and easiest way is to message the company you bought your original gear from. Just ask “Will you please tell me what the wiring order is for the pins 1-5 on the XLR plug? They should understand what you mean. that being said, there is a chance that some extra-shady or incompetent companies may give you the wrong info. Unfortunately this has happened to a few customers that I have spoken to, but it is somewhat rare.
E-nail companies are generally responsive, upfront, friendly and transparent with this information. There’s not much reason to guard this information, unless they are really trying to keep their wiring type proprietary. It’s not like it’s Coca Cola's secret recipe or anything!

Unresponsive sellers:
Transparency in this case is a matter of customer safety, so it’s pretty reasonable to expect to have access to this information. From what I’ve heard, only roughly 1/3 actually ignore this request for information.
"Carpe-Dab-Em"
If you don’t get a response then take the bull by the horns and find out for yourself! There are other ways to figure it out that aren’t actually that difficult. You don’t need an engineering degree or a Tesla floor badge. A quick diagnosis on the heating coil plug is not as hard as it sounds. You will come out with the information you need to replace your gear. You might also learn a handy skill in the process! Read on to find out how to find your heating coil‘s XLR wiring all on your own.
How to find your heat coil pin wiring order:
Supplies: Heat coil, optional pen/paper or digital drawing tool
Tools: optional electrical multimeter if visual testing is not possible
Step 1: Unscrew the plastic housing from the metal housing on the plug’s end. See the pictures below for an illustration of where to twist.

Step 2: Now, pull the plastic piece back with the protective sheath to reveal the inside. You will see a plastic guard that goes around the soldered pins.

Step 3: Carefully separate the metal housing from the pins and remove the plastic guard from around the outside. Note: the plastic guard can be stiff and tricky. If you break it just use one thin layer of electrical tape to wrap around the pins once. 2nd Note: too much tape will make it hard to replace inside the metal housing.

Check Out The Wires
Step 4: Now you should be able to see five wires connecting to their metal pins by solder. Some of these wires vary in thicknesses and/or in color (hopefully). Look to find the two that are thinner than the other three. If you see a pair of thin red and black wires, they are probably the TC’s. You’re in luck! We’re halfway there to being sure about your wiring.

Ground and AC Power Lines:
Step 5: Try to spot the one thicker wire with a unique color (usually green/yellow) to single out the ground wire. The two remaining thicker wires are probably AC power, which are normally interchangeable (since AC is non-polar). DC power runs to the thermocouples (where polarity does matter). For the TC’s, the positive and negative wires need to match up to the positive and negative terminals on the enail controller.

Polarity: Which is TC+ and TC-?
Step 6: Find out which of the wires for the thermocouple is positive and which is negative. Normally the red is positive and the black is negative. If you are sure that you have the TC lines and not the AC lines, you can safely do a trial and error test. You can be reasonably sure of this if there is one set of thick wires and one set of thin wires. This one (below) is an easy one to judge the two thicker black wires from the thinner wires. Those are the AC power lines. The odd (green and yellow) wire is usually the ground, and black and red are the "thermocouple sensor wires"
Make An Easy Diagram
Step 7: Before you cut any wires it’s a very good idea to label any with tape to keep things straight. You’ll thank me later! If your wires are all the same color/size and you may easily lose track of which is which. That’s why if the wires are not distinct enough to differentiate, it’s best to label first before cutting. Cut on the plug side of the label rather than the coil side, so the labels stay on the on the coil side wires. These are the ones that you may lose track of if too similar looking.
After you find the first connection, make a quick sketch with two columns showing the pins #1-5. One column represents the enail controller and one column represents the heating coil. Then draw and connect the appropriate connections to make sure everything is clear and easy before you re-connect.

Twist or Solder
Step 8: After you find and label and/or diagram your pins for both ends on a piece of paper, snip and strip some insulation from the wires. Look at the chart/diagram you made and re-connect appropriately. After re-connecting, use a very thin wrapping of electrical tape or very thin heat shrink tubing for protection.
Test it out!
Step 9: You’ll know if the TC’s are backwards when the temperature display falls instead of climbs as the coil heats up. Temperature readings will quickly fall below zero and start reading negative temperatures.
Tape It Up
Step 10: Once you have it all set and configured to match your controller you can tape it up and start using it! I like to use some 3M Super 33 or Super 8 to finish it off. Be very sparing with the amount of tape you wrap around if you want to be able to get the cable wrapping back around the wires after you’re done!


The Advanced Multimeter Technique
If all else fails, you might have to get a bit more technical with it. It seems as though some sellers are now trying to make it even more difficult to re-wire your coil to match a different controller. I’ve sometimes seen very counter-intuitive wire colors, sizes, etc. If visual cues are missing and throwing you for a loop you can break out your multi-meter and do a couple of tests. These tests will allow you to single out the ground from the TC’s and the AC power. These are the two most important ones to get right. When you hook up the high power AC supply lines to the low power DC lines they will definitely fry and cause major malfunctions.
Switch your multimeter/voltmeter to the continuity tester (looks like a play triangle with a line through it) and test random pairs until you get a beep or indicator of a closed circuit. These two that are connected are the thermocouple lines which do the temperature sensing. You can also test these using voltage (which will vary if you heat it up with your hand or blow on it). After you find these two, switch the multimeter to the ohms test and look for the pair that reads out at about 100 ohms. This pair is the AC power side, which provides heat power to the coil. The remaining pin is your ground, which is normally a yellow/green colored wire.
Pro Tip:
It’s best to cut the wires in different spots just to minimize any future chance of short curcuits. This also makes it easier to get the cable sheath to slide back over the wires later on.
More stories
What the Heck is an Enail!!?

The Puffco New Peak Smart E-Rig: A Comprehensive Look at the Future of Dabbing
The Puffco New Peak Smart E-Rig: A Comprehensive Look at the Future of Dabbing:In the dynamic world of cannabis concentrates, innovation and techno...